 |
| You will need washed and carded fleece or roving |
 |
| Wind the wool round your fingers |
 |
| Turn the wool and wind over the top |
 |
| Place your newly formed ball into a bowl of warm soapy water |
 |
| Knead the wool like clay |
 |
| Add more roving |
 |
| Add liquid detergent and smooth the fibres |
 |
| Leave them somewhere to dry |
 |
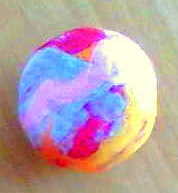
| When dry the ball is soft & light |
(1) You will need washed and carded fleece or roving. If you're a spinner you will probably have a plentiful supply but if you have no source of wool from farms or spinning groups you will probably find that your local craft shop can supply you with small amounts of washed, carded and dyed wool. Ashford do a very good range of washed, carded fleece and you can refer to their website for further information.
(2) Take a long thin piece of the colour of your choice, keeping in mind that the beginning colour will be covered over later by further additional wool. Wind it into a ball in the same manner you would use to wind a ball of string or knitting yarn. (You could start the ball by winding it round the fingers of one hand).
(3) The size of the ball you make will depend upon the size you want for your finished product. You could use approximately an ounce of wool (25 grammes) for your first project.
(4) Add a second colour using just a small piece of wool to go round the ball once
(5) Now, if you wish, you can introduce a third colour and continue to intoduce as many colours as you like. Usually up to three or four colours is all that is necessary.
(6) If you like a transluscent effect tease out a little wool in a contrast colour and spreadit thinly over a part or all of the ball for your final colour.
(7) When you are satisfied that your ball is complete place it gently into a bowl of warm soapy water but keep it in your hand so that at the same time you can gently knead the wool with the tips of your fingers. Add more detergent if required, (dishwashing liquid works well).
(8) Continue to work the wool as you would mould a ball of clay until the surface is smooth and a little slippery so that the fibres of the wool merge into each other
(9) Cup your hands together with the ball in the middle to assist in creating the final ball shape and when you are happy with the shape squeeze it gently to release some of the water. If any of the wool seems to be not properly felted and inclined to come apart you can dip it back into the water or add a little detergent and work it in, smoothing over any cracks in the surface.
(10) Rinse the ball gently under running water from the tap to help drain the soap and then cup your hands round the ball once again to complete the shape and leave it on the bench or a tray to dry. Drying time may vary according to weather conditions. It may dry overnight or take even a day or two longer if it is damp and cold . If you can sit the balls on a window-sill in the sunshine so much the better!
Parents are advised that they are not suitable for Children Under Three due to 'fluff' from wool.
Not suitable for Animals due to 'fluff' from wool.


No comments:
Post a Comment